
I Was Wrong About Guitar Shielding
Every now and then, we make mistakes. Just kidding, it happens ALL THE TIME, but sometimes our failures are worth sharing about because they inform how we proceed from here on out. Today I want to share with you about how I was wrong about guitar shielding. Lots of folks on the internet say that shielding completely got rid of their single coil buzz. A lot of other folks say that shielding isn’t effective, and in most cases brings more problems than it solves. I want to share with you how I approached guitar shielding for years, and why my mind was changed after tech'ing a friend's bass guitar. In this post we’ll share the reasons to shield, the many reasons why you should not shield, and a few myths and tricks to be aware of. TL;DR: Unless you shield your guitar or bass perfectly to create a proper Faraday cage, you shouldn’t do it at all.

What Is Guitar Shielding
Guitar shielding is the process of lining a guitar's or bass’s internal cavities with a conductive material (usually copper foil tape or special conductive paint). The idea is to create a barrier that protects the electronics from external interference. In practice, this means applying the shielding medium inside the control cavities, pickup cavities, and any other routed compartments where your guitar’s wiring lives, not just in the harness section. This has become referred to as cavity shielding, because you’re quite literally shielding the cavities of the guitar. When you complete the shielding in each cavity section and pickguard (if you have one), you form a protective enclosure around the entirety of your wiring components.
Who is this for? Do guitar players actually take the time to shield their guitar? Should every single guitar be shielded? All excellent questions, and we’ll get there, I promise! It turns out that many people take the time to shield their instruments, from DIY enthusiasts to professional guitar techs and high-end boutique builders. Many modern electric guitars come with some form of shielding from the factory, usually a layer of conductive paint in the control cavity, but not always. Most of the ~12,000 guitars produced worldwide every single day (even high-end ones) are not fully shielded. Players recording in studio environments or who play under stage lighting (which can generate interference) often shield their guitars to minimize noise. And it’s especially common among folks who play guitars with single coil pickups, although we’ll identify a few misconceptions in this pickup category later on. Why single coils? Classic single-coil designs (like those in Strats, Teles, and Jazzmasters) are notorious for picking up hum and buzz from the environment. Those pickups, in general, don’t have metal covers like most humbuckers do, which can help shield that part of the exposed circuit from outside interference. Shielding the cavities and pickguard areas that cover those cavities can significantly reduce the ground buzz that’s a persistent background noise until you touch something metal on your guitar, like the bridge, strings, knobs, etc. Humbuckers, by contrast, already cancel hum by design, so shielding is less critical there… right?? This is what I used to believe. I’m going to be bold and controversial, but I believe properly shielding humbuckers might be more critical than single coils, and I’ll tell you why later on in this post.
In a nutshell, guitar shielding involves adding a conductive lining in the guitar or bass’s cavities to block unwanted signals. Typically, this is done using either copper foil tape (which you can cut and stick inside the guitar) or conductive paint (a.k.a. shielding paint that you brush on but please make sure you apply in a properly ventilated area and/or use a respirator). Both methods can work well, and many people even combine them. The end result is like wrapping your guitar’s guts in a tiny suit of armor against unwanted noise. But what noise are we talking about, and wait a minute there’s different types of noise? Yes, and over the last eight years of working in the guitar electronics industry, its become pretty clear that there are some misconceptions about what noise is and if/how shielding can eliminate all/any of it. Lets dive in.

How Does Shielding A Guitar Work
So how does sticking foil in your guitar stop the noise, exactly? The science behind guitar shielding is pretty neat. It leverages the same principle that protects you in your car or in an airplane if there’s a lightning strike: the Faraday cage. When you surround electronics with a conductive enclosure that’s connected to a ground or ground distribution (airplane hull), most external electric fields (like radio frequencies, fluorescent light buzz, etc.) get absorbed by the shield instead of infiltrating your guitar’s signal. Let’s break it down into individual points of how shielding works:
It Creates a Mini Faraday Cage in Your Guitar
When you line the inside of your guitar with metal (let's use copper shielding tape since that’s the most common), you’re effectively creating a mini Faraday cage around the electronics. A Faraday cage is a shield that blocks electromagnetic fields. In our case, the copper or conductive paint forms a shell around the control cavities, preventing a lot of external electrostatic noise from reaching the wiring and pickups. This means fewer buzz or random radio signals coming through your amp. However, and this is VERY important to understand. It’s not a perfect cage, for instance, the pickups themselves still need to be exposed to sense the strings, and very low-frequency magnetic hum (like the classic 60-cycle hum in single coils) isn’t stopped by shielding. However, for most pesky interferences (such as the buzz from your church’s dimmable stage lighting or LED wall, a shielded cavity works wonders by catching those unwanted fields and dissipating them safely to ground.

The Shield Must Be Connected to Ground
Simply lining the cavity with metal isn’t enough; that shield MUST be tied into your guitar’s ground circuit. Grounding the shield is what allows it to funnel noise away. If you get this wrong, you haven’t helped reduce your noise; you’ve amplified it by creating an antenna! When the foil or paint is properly connected to the ground (usually soldered to the main volume pot and then to a common ground point like the bridge pin, trem claw in a Strat, or a grounding screw in to the wood body itself), any interference it picks up gets sent to ground and neutralized, rather than joining your guitar signal. In practical terms, this might involve soldering a ground wire from the copper foil to the back of a volume pot or another ground spot. Often, the pots and jack casing are already grounded, so if your copper tape touches the metal shell of a pot (or a screw that’s grounded), your whole shield will be connected to ground. It’s crucial to achieve good continuity – all the separate pieces of foil should overlap or be soldered so that they form a single, continuous conductive surface. If there are isolated pieces not connected, those won’t provide effective shielding. Think of it as creating one large, unified metal cage. A quick continuity test with a multimeter can help confirm that everything is properly grounded. Once in place, the grounded shield essentially acts as a noise sink, absorbing stray signals and grounding them before they can reach your pickups.

Copper Foil Tape vs. Conductive Shielding Paint
There are two popular methods for shielding a guitar: using copper shielding tape and applying shielding paint. Copper foil tape is a favorite because it’s highly conductive and easy to apply. You basically stick it along the walls and floor of the cavities. It has conductive adhesive backing, meaning overlapping pieces of tape still conduct electricity to each other, forming a continuous shield. For optimal application, wipe out or vacuum the dust from those cavities first, so that the tape adheres better. Routed cavities are notoriously the least cared-for part in the manufacturer's process, so you’ll likely need to do a little cleanup work before the tape will stick well. The copper shielding foil tape is also easy to solder to if you need to attach a ground wire. Conductive paint, on the other hand, is a special nickel or graphite-infused paint that you can brush on the inside of the cavities. It’s great for tight spots or irregular shapes where fitting foil can be tricky. You will absolutely need a few coats of conductive paint to build up a good conductive layer, I’d suggest a minimum of three, and once it’s dry, you’ll run a wire from it to ground (put a small screw penetrating the shielding paint in to the wood and attached a wire from that point to a soldered joint on the master volume pot ground). Both methods can achieve the same goal. Copper might block interference a tad more effectively (and it looks shiny, which is a good reason in my book), whereas paint is stealthier (often used by manufacturers at the factory because it’s quicker to slosh paint in a cavity). Some people even do both: paint first for base coverage and then line with copper foil for maximum effect. The good news is, either approach can dramatically reduce unwanted noise if done correctly.

Covering All the Critical Areas
For shielding to be effective, you MUST enclose as much of the electronics as possible in that grounded conductive layer. This means shielding the control cavity (where your pots and switch are), the pickup cavities (yes, even for humbuckers), and even the output jack cavity if accessible (A Strat is a good example of this, where the output jack is in a separate cavity from the rest of the electronics). If your guitar has a pickguard (such as a Stratocaster or a Jazzmaster), you also need to apply foil to the underside of the pickguard. That way, when the pickguard is screwed back on, its foil backing makes contact with the shielded cavities, closing off the enclosure. If you used shielding paint in the cavity, use shielding tape on the pickguard and run a small piece of the tape along an edge of the cavity to ensure continuity between the pickguard and the painted cavity. In guitars with rear control covers (like Les Paul styles), you can line the inside of those plastic covers with foil as well. Essentially, you’re trying to create a continuous metal cage around all of the electronics, with only small necessary openings (like where the pickups face the strings). When done correctly, this forms a nearly complete Faraday cage around your guitar’s electronics. Just remember that any shield is only as good as its continuity – all the pieces of metal must touch and be grounded together. Also, be mindful of wiring after you shield: if you have any exposed signal wires (the + side of your signal chain) or contacts (like lugs on a switch or jack) that press against the shielding, they will short out to ground and now your signal is dead. To avoid that, you can use a bit of insulation (heat shrink tubing or electrical tape) on those contacts, or simply push wires aside so they don’t squish against the foil when you reassemble. A little attention to detail here ensures your newly shielded guitar remains quiet and functions properly, without any accidental ground-outs.
Does Shielding Guitar Affect Tone?
One of the internet's most persistent myths is that shielding your guitar kills your tone. Let's be honest, the worst thing that could happen with shielding is your entire signal gets cut because you installed it wrong, ha! But shielding does not negatively affect your guitar’s tone in any way, as long as it’s done correctly. The only thing you’ll likely notice tone-wise is the absence of that annoying buzz in the background, which actually lets your true tone shine through more clearly. Your guitar will still sound like your guitar, just quieter when you’re not playing.
How to Shield A Guitar
Ready to turn your noisy guitar into a quiet tone monster? Shielding a guitar is a fairly straightforward DIY project if you’re comfortable taking your guitar apart a bit. Here’s a step-by-step guide. We’ll be using copper foil tape for this example (the process is similar if you use shielding paint). Before you start, always ensure your guitar is unplugged and work in a well-lit area. It’s also a good idea to take photos of your guitar’s wiring before you remove anything, just in case you need to remember where things go.

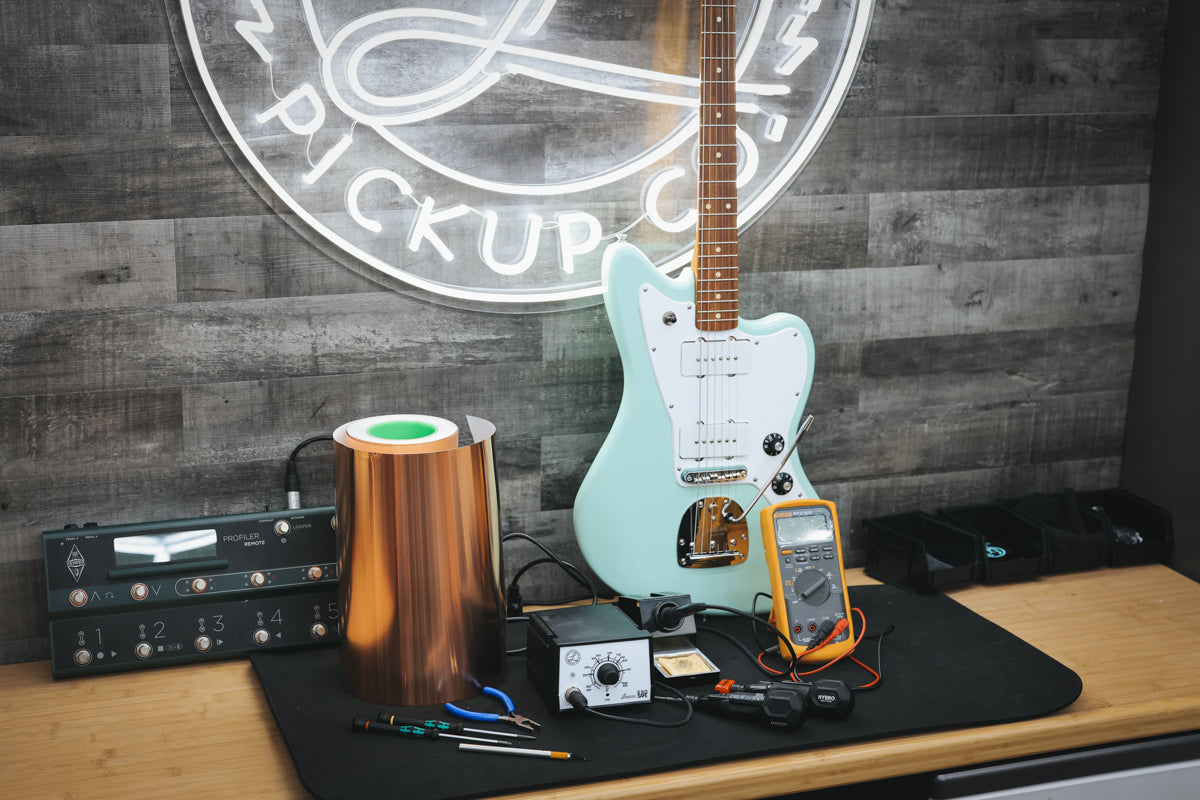
Step 1: Gather Materials and Tools
Get all your supplies together so you don’t have to stop midway. You will need copper foil tape, a screwdriver (to fit your guitar’s screws), a razor blade or Xacto knife (for cutting the tape neatly), a soldering iron and solder (to connect the ground wire), and a multimeter (which helps check continuity later). If you’re using shielding paint instead of tape, you’ll need a small brush and the paint (usually sold in little jars). Also, grab some basic tools, such as pliers or tweezers (for placing tape in tight spots), and a marker. A small vacuum, a wet cloth, and/or some double-sided sticky tape to clean out the routed cavities. Oh, and don’t forget to have new strings on hand if you’re removing the old ones. It’s also smart to have a clean workspace or bench to lay the guitar on, and maybe a towel to protect the guitar’s finish.
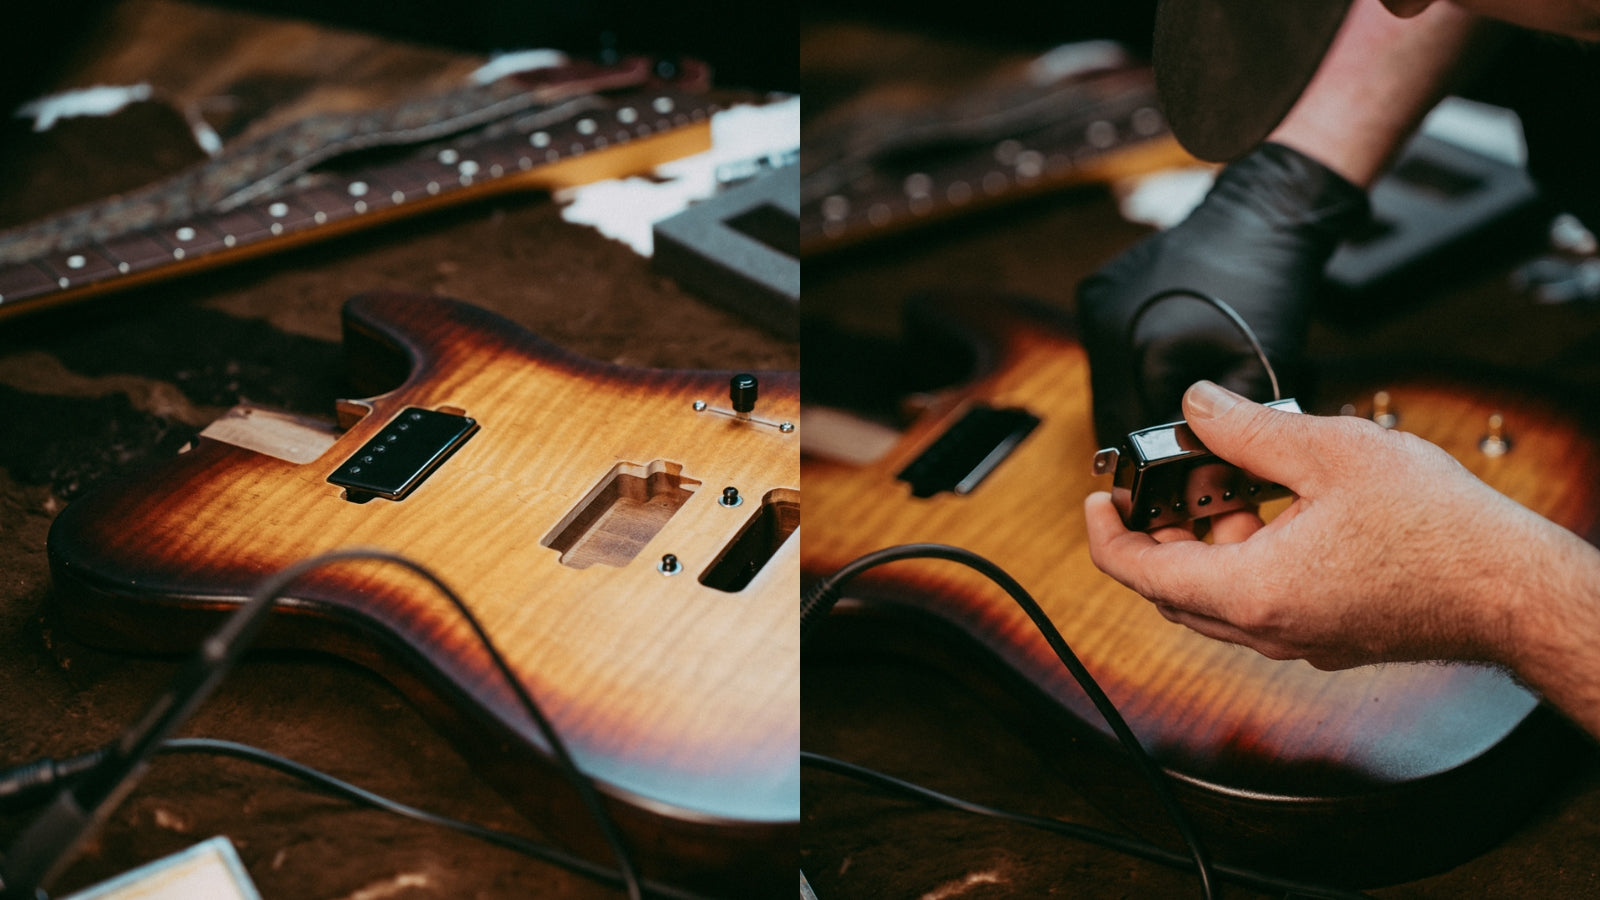
Step 2: Remove the Strings and Open the Guitar
Next, you’ll need to expose the guitar’s internal cavities. Start by removing or loosening the strings and then take off any covers or the pickguard to access the electronics. If it’s a Strat-style guitar, you’ll unscrew the pickguard; on a Les Paul or similar, you’ll unscrew the back control cavity cover and the pickup mounting rings to get pickups out. On a Telecaster, you will remove the control plate, bridge plate, and pickguard. We’ll be using a Jazzmaster as our example, so we’ve covered the most common guitar types. As you lift the pickguard or control plate, be gentle – the pickups and wiring will still be attached. You don’t necessarily need to desolder anything; you can usually push the pickguard slightly to one side or prop it up to access the cavities. Be careful not to stress or yank any wires. Take note of any ground wires screwed into the cavity (for example, many guitars have a ground wire from the bridge or tremolo claw that goes into the control cavity). Make sure these stay connected because you’ll want to reattach them later if they come loose, since they ground the bridge and strings. Set aside all screws in a safe container so you don’t lose them (I use a magnetic cup, so even if I knock it over, the screws will stay secure). By the end of this step, you should have the internals of your guitar exposed: the control cavities and pickup cavities ready for shielding.

Step 3: Apply Copper Foil to the Cavities
Now for the fun annnnnnd sometimes tricky part: lining the cavities with your copper foil tape (or applying shielding paint). Cut it into manageable strips or pieces. Start by lining the control cavity walls and floor. Peel the backing and press the foil firmly onto the wood. It’s like putting up wallpaper in a very tiny, curvy room. Overlap each piece of foil slightly with the next so that they make continuous contact with one another. Cover the sides of the cavity and the bottom completely. Repeat this process for each pickup cavity, lining the inner walls and bottom with foil. You can fold the tape around corners or use multiple small pieces to cover odd shapes. Just make sure everything overlaps nicely and there are no gaps left. If there’s a channel or hole where wires pass between cavities, you can even roll up a little piece of foil and feed it through or line the hole, so that shield coverage continues through the passage. Tip: Use a piece of foam or a medium-sized paintbrush to press into the foil tape, creating a good stick without puncturing it. If you opted for shielding paint, you’d brush on an even coat inside each cavity, let it dry, and do 2-3 more coats for good measure. Painted shielding should cover the same areas, walls, and floor of each cavity. Don’t forget to also shield the backside of any removable covers or the pickguard: cut a piece of foil to fit the underside of the pickguard and stick it on. Use an Exacto knife to cut the tape out of the control knob holes and pickup cutout shapes. This foil on the guard will contact the cavity foil when assembled, closing the cavity and completing the shielding box. Once you’ve finished applying copper to all relevant areas, double-check that all separate pieces of foil are touching one another or will touch once the guitar is reassembled.
Step 4: Connect the Shielding to Ground
With the cavities all nicely shielded, we need to make that shielding functional by grounding it. This typically means connecting the copper foil to the guitar’s common ground. The easiest way is to solder a wire from the foil to the back of a potentiometer (the master volume pot is a common choice) or to the sleeve terminal of the output jack – basically any point that is already grounded in the circuit. Often, if the foil from the cavity overlaps onto the top where a pot or switch washer touches it, the pot’s casing will ground the foil automatically when you tighten it down. However, I prefer a solid, dedicated connection. Find a spot in the cavity where you can attach a shield wire. Often, people will screw a small wood screw into the side of the cavity through the foil, then solder a wire from that screw (or directly from the foil) to a ground point on the pot. If using shielding paint, manufacturers often embed a small screw in the paint for this purpose. The idea is to electrically link the entire foil/painted shield to the ground bus of the guitar. Heat up your soldering iron and carefully solder a wire onto a section of the copper foil. Solder the other end of that wire to the back of a pot. Alternatively, solder to the ground lug of the output jack. Note: If you’re uncomfortable with soldering, you can potentially rely on mechanical connections (such as foil touching a grounded pot or jack barrel), but soldering is the most secure method. Once done, your new shielding is officially part of the guitar’s ground network. All those foil-lined surfaces are now a unified shield ready to absorb noise and send it to the ground. Use a multimeter to test continuity between the foil in different cavities and the guitar’s ground (for example, a pot casing or the sleeve on the other end of your guitar cable plugged into the output jack). You should get near 0 ohms (You can see below we have 0.2 ohms perrrrrrfect!) if everything is connected. This confirms your copper shielding job is complete and effective.

Step 5: Reassemble and Test
Time to put your guitar back together and enjoy the silence! PAUSE! Many people on their first shielding job put their guitar back together only to realize their pickups no longer work. That’s because we’ve been so concerned with with (-) ground side of the signal that we’ve forgotten about protecting the (+) hot side, and it’s grounded out somewhere. So, before you put it all back together, plug a cable into the output jack of your guitar, cycle through the switch positions, and make sure that you’re getting a reading that isn’t 0 or overload. If you don’t have a DMM (digital multimeter), you can do this with your amp! Plug it in, gently tap the magnet poles or screws of each pickup while swapping the switch through its positions to confirm that you have output if you don’t, trace backwards from the output jack (+) and find the physical touch point of your new shielding ground. Fix, isolate, insulate, and re-test.
Gently place any pickups back into their cavities and position the pickguard or control plate back in place, being cautious not to pinch any wires against the new foil (remember, if a hot lead gets squashed into the foil, it could short out). Reinstall all the screws for the pickguard, control plate, and covers. Double-check that any ground wires you encounter (such as the bridge ground wire) are still correctly attached to the circuitry or making contact with the shield where they should. Once everything is screwed down, put on a fresh set of strings (or the old strings if you’re just testing) and tune up the guitar. Now, moment of truth: plug it into your amp. You should immediately notice that, when you’re not touching the strings or playing, the background is much quieter than before. Ideally, that irritating buzz or radio interference has either vanished or been greatly reduced. If you still hear some hum, remember that single-coil pickups will always have a 60-cycle hum – shielding DOES NOT eliminate the inherent hum of single coils, but it kills the extra stuff. Try facing different directions or moving away from electrical devices to hear the difference now that the guitar is shielded. It should be significantly improved. Pat yourself on the back for a job well done! You’ve just performed a classic upgrade that many players swear by. At this point, you can enjoy your guitar with far less noise, and you haven’t lost your tone; you’re hearing it with additional clarity and just made the guitar more professional and studio-friendly.
Wrapping Up: For years, I was sure that shielding made less of a difference than some claimed it did. I’ve heard people claim that shielding eliminated their 60-cycle hum, which is impossible. I’ve personally worked on instruments that had shielding, but they had more buzz than a guitar without it. That said, after a brand new Fender bass came into my shop with low-output hum-canceling Pbass pickups, and this sucker had so much noise, I knew there had to be a problem. From the factory, it had zero shielding, so I took a chance, and I came out a believer. Guitar shielding proved itself to me by transforming that noisy bass into a silent monster. This is why I’m convinced that proper shielding on humbucker guitars and basses is absolutely critical. Single coils are inherently noisy; we are all aware of this. So if you don’t have shielding, it’s not as “obvious” that you have a little more additional ground buzzing going on. But humbuckers are supposed to be silent, and nothing bothers me more than my baseline noise getting WORSE after I’ve finished my note and take my hand off the strings. At the end of the day, there’s nothing “mystical” about it; it’s just solid engineering making your rig quieter. I was wrong about guitar shielding, and I’m happy I was, because now I get to enjoy buzz-free tone and share this experience with you. Happy shielding, and may your tone be forever hum-free!
If you'd like to take on this job independently and need some tools, check out our tech tools, available and ready to ship today.
De Kurtis Lamberton
3 comentarios
+1 for shielding humbucker guitars. I have a 2023 les paul standard that i got new and it had an issue where it would crackle when it moved against your body. Really loud when you had overdrive on or compressed clean. The issue was in static buildup between the new nitro clear coat and the plastic cavity covers (from what i could read online). Shielding the control cavity did not eliminate it, but when i also shielded the pickup switch cavity (including the cavity covers) it eliminated all crackling from that point on. My guess is that any buildup now goes to ground
Simon Gugala
Great Article, always like to see what another person’s take is on something that is a little bit controversial. Some truly believe shielding is a waste of time and useless, while others believe it’s something every guitar should have. Personally I’m a believer, hearing the results for myself. Would like to add something for the person trying this for the first time. Since a newly shielded Guitar came across the bench once, which had more unwanted noises than prior to being shielded. The example pics posted show it, but not sure it was outright expressed. Very well explained the pickguard or cavity cover be shielded as well as all the cavities bottoms and sides, ALSO make sure (as demonstrated in the images) the copper tape is laid slightly over the top as to connect with the pickguard or cavity cover. Not much , just slightly.
As stated, quite a while back had this lovely looking shielding work completed by a client brought in and now sounded worse than before. The owner was very concerned he had ruined his guitar somehow and should have never shielded it in the first place. His work was extremely neat and tidy. However running up the sides of the cavities he had stopped the foil just before reaching the top. Therefore the pickguard was not connected (touching) via any shielding, which also stopped the separate pickup cavities from being all one grounded faraday box. Fact is , at first glance, didn’t notice being more impressed how tidy his work was (LOL), then saw right away. Suggested he run the copper tape up the sides and slightly over the edges. As well as running the copper between all cavities.As in your pics the copper tape runs slightly over the top edge, making a connection with pickguard shielding tape. May sound obvious, still thought I’d toss it out there, experiencing otherwise.
Well written and explained article, cheers
David
David L
Without this information, I put copper foil completely inside the cavities of a Squire Strat and a Squire Tele. I also put it on the back of the pickguards. Then a guitar tech installed new switches, new Lambertone humbuckers and single coils in the Strat and new Fender Texas Specials in the Tele. Both have no hum now. I wish that I had seen this before I started. It would have made my work considerably easier. Through trial and error I discovered what you clearly explain.
. newSDarwin Peterson
Dejar un comentario
Este sitio está protegido por hCaptcha y se aplican la Política de privacidad de hCaptcha y los Términos del servicio.