
How to Test A Guitar Pickup
Did you know that guitar pickups are the heroes of your tone? Those little coils of wire and magnets are responsible for turning your string vibrations into sound. Bad tone is not a symptom of faulty pickups; no tone is. If a pickup isn’t working right, your tone will suffer no matter how well you play. Today, I’m sharing a SUPER SIMPLE guide on the basics of testing a guitar pickup, along with tips to optimize your guitar tone. A more comprehensive guide is coming, but for now, let's keep things simple and effective. We’ll also dive into some essential guitar string maintenance: how often to change strings and how to change guitar strings step by step. Whether you’re a beginner or a professional player, these practical tips will help you keep your gear in great shape and your guitar off the tech bench as much as possible.

How to Test A Guitar Pickup
There are a couple of scenarios in which we can be pretty sure that the pickups need checking. However, I want to clarify that we’re only discussing the pickups themselves, not the wiring harness or components they're connected to. That’s a whole other story. Pickups don’t usually “grenade” themselves, but under certain circumstances whether its wear & tear, spilled substances, leaning the guitar against a big speaker cabinet (please don’t do that), or you’ve made a modification to the wiring itself, when it’s time to test your guitar pickups it good to understand How to Test A Guitar Pickup properly. There are several methods, including the use of simple tools such as a multimeter, percussion tests, and/or magnetic field polarity tests. Here are some reliable methods to verify if your pickup is working correctly:

Method 1: Perform a “Tap Test” (percussion test)
We’ll start with the basics that require tools everyone has access to. You can do this sound test with just your guitar and amp. First, plug the guitar into an amplifier (keep the volume medium-low). Select the pickup you want to test and ensure the guitar’s volume is at 10. Gently tap the pickup’s pole pieces with a metal object like a small screwdriver. You should hear a clear click or pop sound through the amp each time you tap a magnet pole piece or screw. This indicates that the pickup is translating mechanical vibration into an electrical signal. Do this for each pickup position, i.e. neck pickup and bridge pickup as if one magnet or screw is percussive on a neck pickup, you don’t need to test the other 5 (or 6 if it’s a 7-string).. If one pickup doesn’t respond (while the others do), that pickup or its wiring could be faulty. Don’t forget to toggle your selector switch to each respective pickup position before tapping. If your switch is in the neck position but you’re tapping the bridge pickup, you shouldn’t get any audible output right? At least that’s how it should go. If you want to test the bridge pickup, flip the switch to the bridge position and then test the bridge pickup. If you do get audible output from both pickups when the switch is in the neck or bridge position, this indicates that the switch has a fault and needs to be addressed as the signal from both pickups is getting through at the same time.
Another thing to listen for is excessive hum or noise. Single-coil pickups will hum by nature, but if a normally hum-canceling humbucker is buzzing like a single coil, one coil may not be functioning properly. You can further test by touching the pickup’s hot lead to ground – a loud buzz that stops when touching could indicate a shielding or grounding issue, not the pickup coil itself. In general, a tap test combined with playing a few notes can quickly tell you if a pickup is working and responding. It’s a good idea to do a tap test anytime you rewire or install new pickups, just to verify everything is connected right before you restring the guitar.
Troubleshooting Tip #1: If a pickup sounds weak or thin when both it and another pickup are on together (think middle position), it is out of phase with the other pickup. This isn’t a “broken” pickup, but rather a wiring configuration issue. Swapping the hot and ground wires on one of the pickups can fix an out-of-phase issue. (Be mindful of color codes again – different brands have different polarities for coil magnet directions and wire colors.) Always double-check that your pickup’s wires are connected to the correct places according to the diagram. A quick wiring inspection can save you a lot of tone headaches.
Troubleshooting Tip #2: If you’re dealing with single coils, or a mix of single coils and humbuckers, understanding the polarity of the pickups is important especially when you’re diagnosing a problem. There are multiple ways that pickups sets are designed to work together, which is why here at Lambertones we don’t love the idea of “breaking up a family” of guitar pickups that were designed to work together. It is possible to mix and match pickups from different manufacturers, but it can be tricky and here’s why.
Let's take a Stratocaster for example in the SSS configuration. Three single coil pickups that need to work together in combination with a 5-way switch. Most traditional Strat pickups are designed to be RWRP (reverse-wound and reverse-polarity). This means that in the middle position(s), (position 2/4), you are in phase AND hum-canceling. However, some vintage Strats were designed to be in phase but NOT hum-canceling, and that means the pickups are wound and magnetized differently. Take a look at this table below to see how this breaks down.
 So let's imagine our SSS Strat got worked on by a well-meaning buddy, and he installed a set of new pickups for us, yay! Position 4 (neck + middle) is super thin and weird sounding, boo! But positions 5, 3, 2, and 1 are all normal?! How the heck do we fix that? It’s important to remember that single coils will always make sound regardless of which wire is designated as the hot (+) or the ground (-). You can swap those back and forth all day and the pickup will work just fine. Things get complicated when you add more pickups, which is why we’re doing this exercise! OKAY, since we know 4 of the 5 positions on their own are good to go, we need to consider the pickups, when combined, that do have issues. In this case position 4 is thin-sounding (out of phase) and not hum-canceling, so we know that the neck and middle pickup are not playing nice. Referencing our table, we can see that there are only two reasons for being out of phase AND not hum-canceling. The pickups either have the same winding direction (hot and ground) and the opposite polarity (neck = north and middle = south), OR, the pickups have the opposite winding direction but the magnetic polarity are the same (neck and middle = North i.e.).

Method 2: Measure Pickup Resistance with a Multimeter
One of the best ways to test an electric guitar pickup is with a digital multimeter (DMM) set to measure resistance (Ohms). A functioning pickup will have a certain resistance value in kilo-ohms (kΩ) depending on its design. To do this without removing the pickup, you can measure from the guitar’s output jack:
-
Turn your guitar’s volume and tone control knobs all the way up to 10, and set the pickup selector to the pickup you want to test.
-
Plug a guitar cable into the output jack (but not into an amp).
-
On the free end of the cable, touch one multimeter probe to the tip of the plug and the other probe to the sleeve (the part near the cable).
After a moment, the multimeter will show the pickup’s resistance. Compare this reading to the expected value from the pickup’s specs. For example, a typical Strat single coil might read ~6 kΩ (not here at Lambertones, but we’re not typical ha!), while a medium output humbucker might read 7–10 kΩ. If your humbucker is reported to have ~7.5kΩ but it’s measuring ~3.75kΩ, that’s indicative of one of the humbucker coils being “dead” or a short to ground.
Make sure any push/pull pot or mini toggle switch (if you have either) for a coil-split mod is disengaged and test again. If the result continues, you have a humbucker pickup that needs servicing. Readings that are way off (like 0 or infinity) indicate a serious problem (short circuit or broken coil). If the reading is close to the expected value (give or take a bit), the pickup's windings are likely fine. This simple multimeter test confirms your pickup has continuity and isn’t dead. It does NOT indicate the presence of a magnetic field, however, and you need both for a pickup to work. If you don’t get any reading at all, the pickup might have an open circuit (broken wire) and likely needs servicing by a qualified guitar tech who has experience with pickups or a pickup manufacturer.

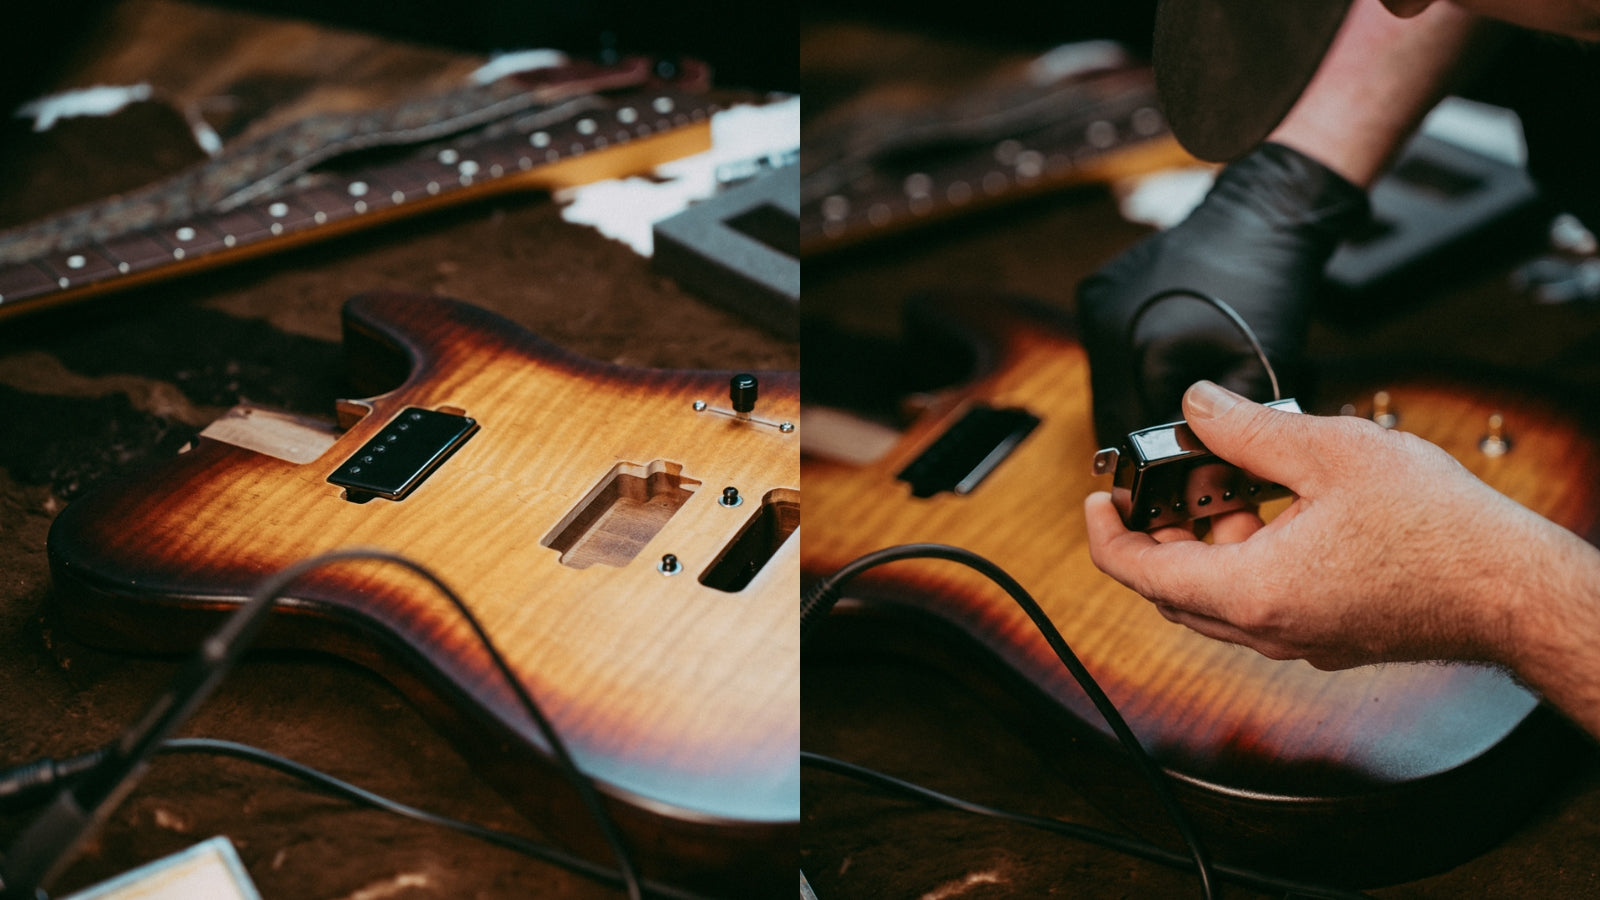
Method 3: Check Directly at the Pickup (and Color Codes)
If you suspect an issue or want a more direct test (removing the wiring harness from the equation), you can measure the pickup’s resistance from its own lead wires (this often requires “opening the guitar”, lifting the pickguard, and/or removing the pickup completely). Disconnect the pickup from the rest of the circuit (unsolder or unclip the hot and ground wires), then touch one multimeter probe to the pickup’s hot lead and the other probe to the ground lead. This will measure the pickup alone, isolating it from volume pots or other electronics that could slightly affect the reading, and/or be the cause of a wiring issue outside of the pickup entirely.
For single-coil pickups (like a Telecaster or Stratocaster pickup, or a P90), there will typically be one hot wire and one ground wire (start wire and finish wire); it is easy to identify. Humbuckers, however, often have four conductor wires plus a bare ground. In that case, you’ll need to know the manufacturer’s color coding to test properly. For example, Lambertones humbuckers use green as the hot output to the switch, black as ground, with red and white wires being the coil finishes that are tied together for series wiring. For the initial test, you can keep those two connected. Also, keep in mind that it does not matter which multi-meter probe is touching which pickup lead wire; the measured result is the same. (Other brands use different color codes, so always double-check the diagram for your specific pickup model.)

To test a 4-wire humbucker’s full resistance, you typically connect the two series link wires together (e.g. tie the red and white leads), then measure between the hot lead (e.g. green) and ground (e.g. black). You should get a reading close to the pickup’s spec. If not, you might then test each coil separately – for instance, measuring between certain color pairs to see if one coil is open/shorting out. Verifying the correct resistance on each coil confirms the pickup’s health. This method is especially useful if you have loose pickups not yet installed, or to pinpoint an internal issue when Method 2 gave an unexpected result.
How to A Make Guitar Pickup Sound Better
Maybe your pickups are working fine, but you’re not 100% happy with your tone. There are several tips and tricks that can make a guitar pickup sound better or at least optimize it for your preferences. Even if you don’t plan to swap your pickups, doing the following can help you squeeze the best tone out of your existing setup. Here are some ideas:
Tip 1: Adjust Your Pickup Height for Optimal Tone
One of the fastest tone improvements you can do is simply adjusting the height of your pickups. Raising or lowering the pickup changes its distance from the strings, which affects output and tone. In fact, adjusting guitar pickup height is one of the easiest ways to improve your tone; a few turns of a screwdriver can yield more output, better clarity, and a balanced response. Follow our guide on how to dial in your pickup height like a pro here!
If a pickup is too high (close to the strings), the magnets can pull on the strings too much, causing weird effects like warbling pitches or reduced sustain. The tone may also get boomy or overly thick, and you might even experience the dreaded “wolf tones” (strange out-of-tune overtones) if the magnets are overwhelming the string vibration. On the other hand, if a pickup is too low (far from the strings), the output will drop and the sound may become thin or weak. The sweet spot is usually a moderate distance: many manufacturers suggest starting around 1/8 to 3/32 of an inch from the string (when pressed at the last fret) as a baseline and then fine-tuning by ear. You can follow our official guide on how to dial in your pickup height like a pro here!
Tip 2: Use Your Volume and Tone Controls
It might sound obvious, but don’t forget the tone-shaping tools built into your guitar. Your pickup’s output can be drastically shaped using the guitar’s volume and tone knobs. Many guitarists leave everything on “10” all the time, but rolling back the volume a bit can clean up a muddy neck humbucker or reduce harsh overtones on a bridge pickup. This works especially well if you have higher-output pickups – backing off the volume to 7 or 8 can make the tone more open and less compressed, effectively making a hot pickup behave more like a medium-output one.
Likewise, the tone control is your friend. If your single-coil bridge pickup is too ice-picky or bright, gently roll down the tone knob until the treble smooths out (this can make a Strat’s bridge pickup much more usable for leads). Conversely, if you want extra brightness or snap, keep those tone knobs all the way up. Using the tone knob creatively can even emulate different tones; for instance, a neck pickup with the tone rolled off can approximate a jazzy, warm sound. It’s a good idea to experiment with different knob positions to see how they affect your pickup’s character.
Remember, pickups capture the raw sound, but your tone control network (the pots and capacitor in your guitar) can filter that sound. If you find that even at zero the tone is still too bright, or at full it’s too dark, you might consider the value of your tone potentiometer (e.g. 250k vs 500k) or the tone capacitor’s value – but those are deeper mods. For most players, simply learning to ride the knobs can dramatically improve your tonal versatility. Don’t be afraid to make subtle tweaks on the fly as you play; that’s what the controls are there for!
Tip 3: Reduce Noise (Especially with Single-Coil Pickups)
Noise and hum can make even a great pickup sound bad. If you’re using single-coil pickups, you’ll inherently get that 60-cycle hum – it’s part of their charm and curse. However, there are ways to minimize it so your tone is clearer. First, use your pickup selector smartly: on guitars like Stratocasters or Telecasters that have two pickups on together in certain positions (e.g. the 2 and 4 positions on a Strat, or middle position on a Tele), the pickups are usually wired to be hum-canceling as a pair (a pickup is reverse-wound/reverse-polarity to its accompanying pickup). These positions will be hum-canceling, so they’re handy if the hum is getting out of hand.
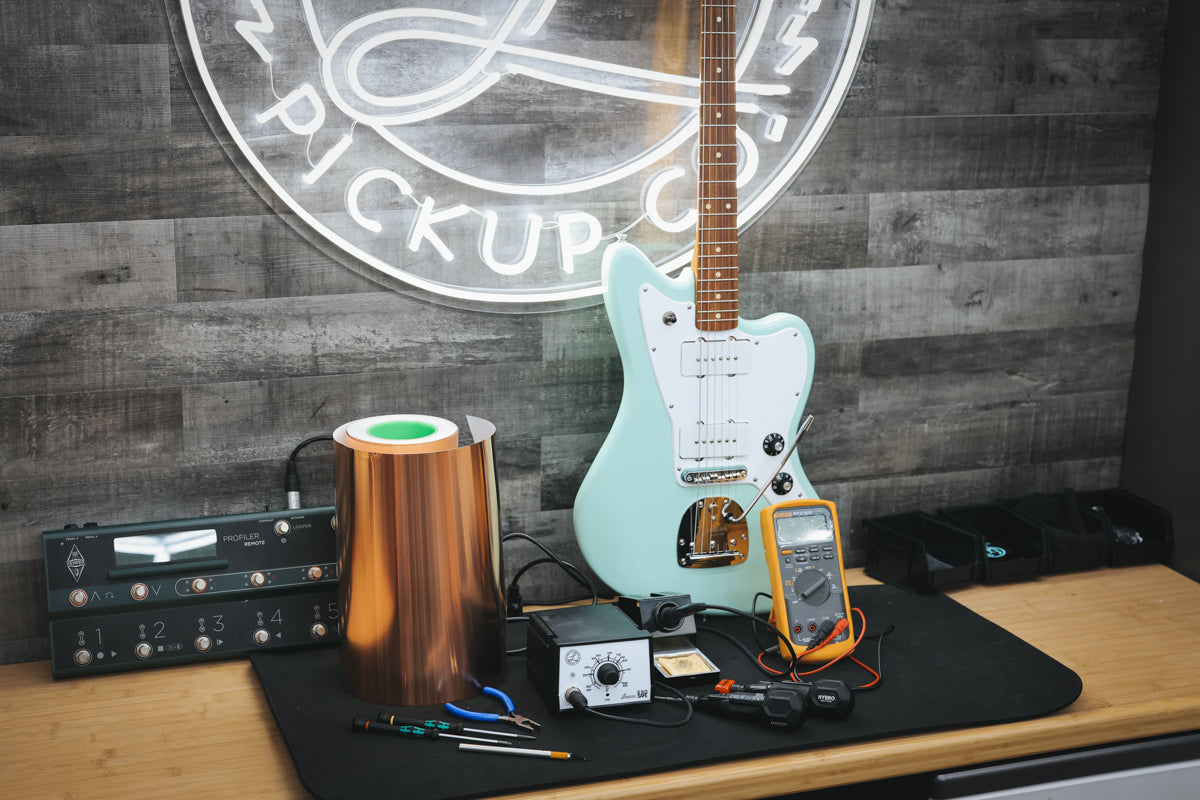
You can also look into shielding your guitar’s electronics cavity with copper or aluminum foil tape. Shielding creates a Faraday cage that can reduce interference noise. It WILL NOT eliminate single-coil hum entirely, but it can reduce other buzz and make a cleaner background for your tone. Ensuring all your equipment is properly grounded is important too, because a bad ground can cause loud buzz. If your guitar buzzes until you touch the strings, that’s a good sign that you have a ground issue. Specific environments can have different levels of electrical noise too, as a last resort a noise gate pedal or effect in your signal chain can help by gating the signal when you’re not playing (though it won’t fix hum while you sustain notes).
For a more extreme solution, you could switch to hum-canceling pickups (such as stacked single coils or rail humbuckers that fit in single-coil size), but if you love the classic single-coil tone, you may not want to change them. Instead, embrace some simple habits: when you’re not playing, turn your volume off to mute the pickup; stand a bit away from fluorescent lights, computer monitors, or tools like soldering stations which often induce noise. By taming the noise, you allow more of the pure guitar tone to come through, and your pickups will sound better when you hear the actual notes, rather than a loud hum underneath.
Tip 4: Keep Your Guitar Strings Fresh and Clean
Old, dirty guitar strings can degrade even premium pickups to sound more dull and lifeless. If your strings feel grimy or your tone lacks sparkle, it may be time for a string change. Fresh strings have a vibrant ring and sustain that really let your pickups shine. It’s a good habit to wipe the strings down with a cloth after each playing session to remove sweat and dirt, keeping them sounding brighter longer. You can also use a dedicated string cleaner or conditioner to reduce gunk and corrosion to extend the strings life a few weeks.
Many modern strings come with thin coating (e.g. Elixir, D’Addario XT series). These coated strings are a good idea if you want your strings to last longer without losing too much tone or feel. Coated strings can often last 2-3 times longer before sounding dead. Keep in mind, no matter what, after enough hours of playing, strings start to oxidize and flatten in tone. So, don’t expect your pickups to sound bright if the strings have been on the guitar for a year without being cleaned. Regular string changes are key to consistent good tone (we’ll discuss how often you should change strings in a moment). By keeping fresh strings on and taking care of them, you ensure your pickups always have a good signal to work with. As a bonus, new strings also help you stay in tune better and feel nicer under your fingers.
Related: How Are Guitar Pickups Made
(For more ways to dial in a killer tone, check out our guide on how to get a good tone on guitar.)

How Often Should You Change Guitar Strings
Guitar strings don’t last forever. But how often is often enough to change them? The answer depends on how much you play, how aggressive your playing is, and even how much you sweat. How often you should change strings is a common question, and while there’s no strict rule, experts do have general guidelines. A popular recommendation is to change strings about every 3 months or after 100 hours of play, whichever comes first. This is a ballpark for the average casual player. If you play daily for an hour or so, 3 months (roughly 90-100 playing hours) is when strings typically start to sound noticeably dull.
For frequent players or performers, you will likely change strings much more often. Gigging musicians might change strings weekly, or even before every big show to ensure maximum brightness and reliability. If you play 2-4 hours every single day, you might find strings only last a few weeks before losing their tone. On the other extreme, if you don’t play your guitar often, strings will still degrade over time (they can corrode from humidity in the air, and any sweat or other oils from your hands that haven’t been wiped off will eat away the coating or corrode the alloy). Even if hardly used, after 6 months to a year, your strings may have tarnished or lost some of their brilliance. A good rule of thumb for a guitar that mostly stays in the case is to still change strings at least once or twice a year to keep them is decent shape.
Ultimately, let your ears and fingers guide you. Signs of string wear include: the strings sound dull or lack sustain, they won’t stay in tune well, you see visible rust or discoloration, or the strings feel stiff and crusty. If you notice any of these, it’s time to swap them out. Old strings not only sound worse – they’re more prone to breakage and can even intonate poorly. (Ever struggled to get your guitar perfectly in tune, only to find an old string was the culprit? It happens.)
One of the best pieces of advice is: if in doubt, change them out. The cost of new strings is relatively low, and if you keep up on your string changes, you may not experience significant tonal improvement, BUT the opposite is very real. Dead strings sound bad! So don’t let them die before you swap those out. Plus, you get that smooth feel of new strings, which can make playing more enjoyable. As a side note, always have a spare set of strings in your case. If a string breaks suddenly (and we’ve all had a string break at the worst time!), you’ll want to replace it immediately. Ideally, if one string breaks and the set is already old, replace the entire set so that your tone remains consistent across all strings. Keep an eye (and ear) on your strings, and you’ll get a feel for what lifespan works for you.
Final Thoughts
Guitar maintenance can be daunting. For a relatively simple instrument, there’s a lot of stuff going on! But with a little patience, practice, and (I can’t stress this enough) systematic approach when it comes to diagnostics, you too can learn your instrument more intimately and even save a ton of money on tech bench time!
We’d love to help you love your tone, so check out our best sellers for the hottest pickups that our customers love. Welcome to the family!
Written by Kurtis Lamberton

Leave a comment
This site is protected by hCaptcha and the hCaptcha Privacy Policy and Terms of Service apply.